
DIY Freestanding Triangle Pergola
Hello DIY Decorating Enthusiasts,
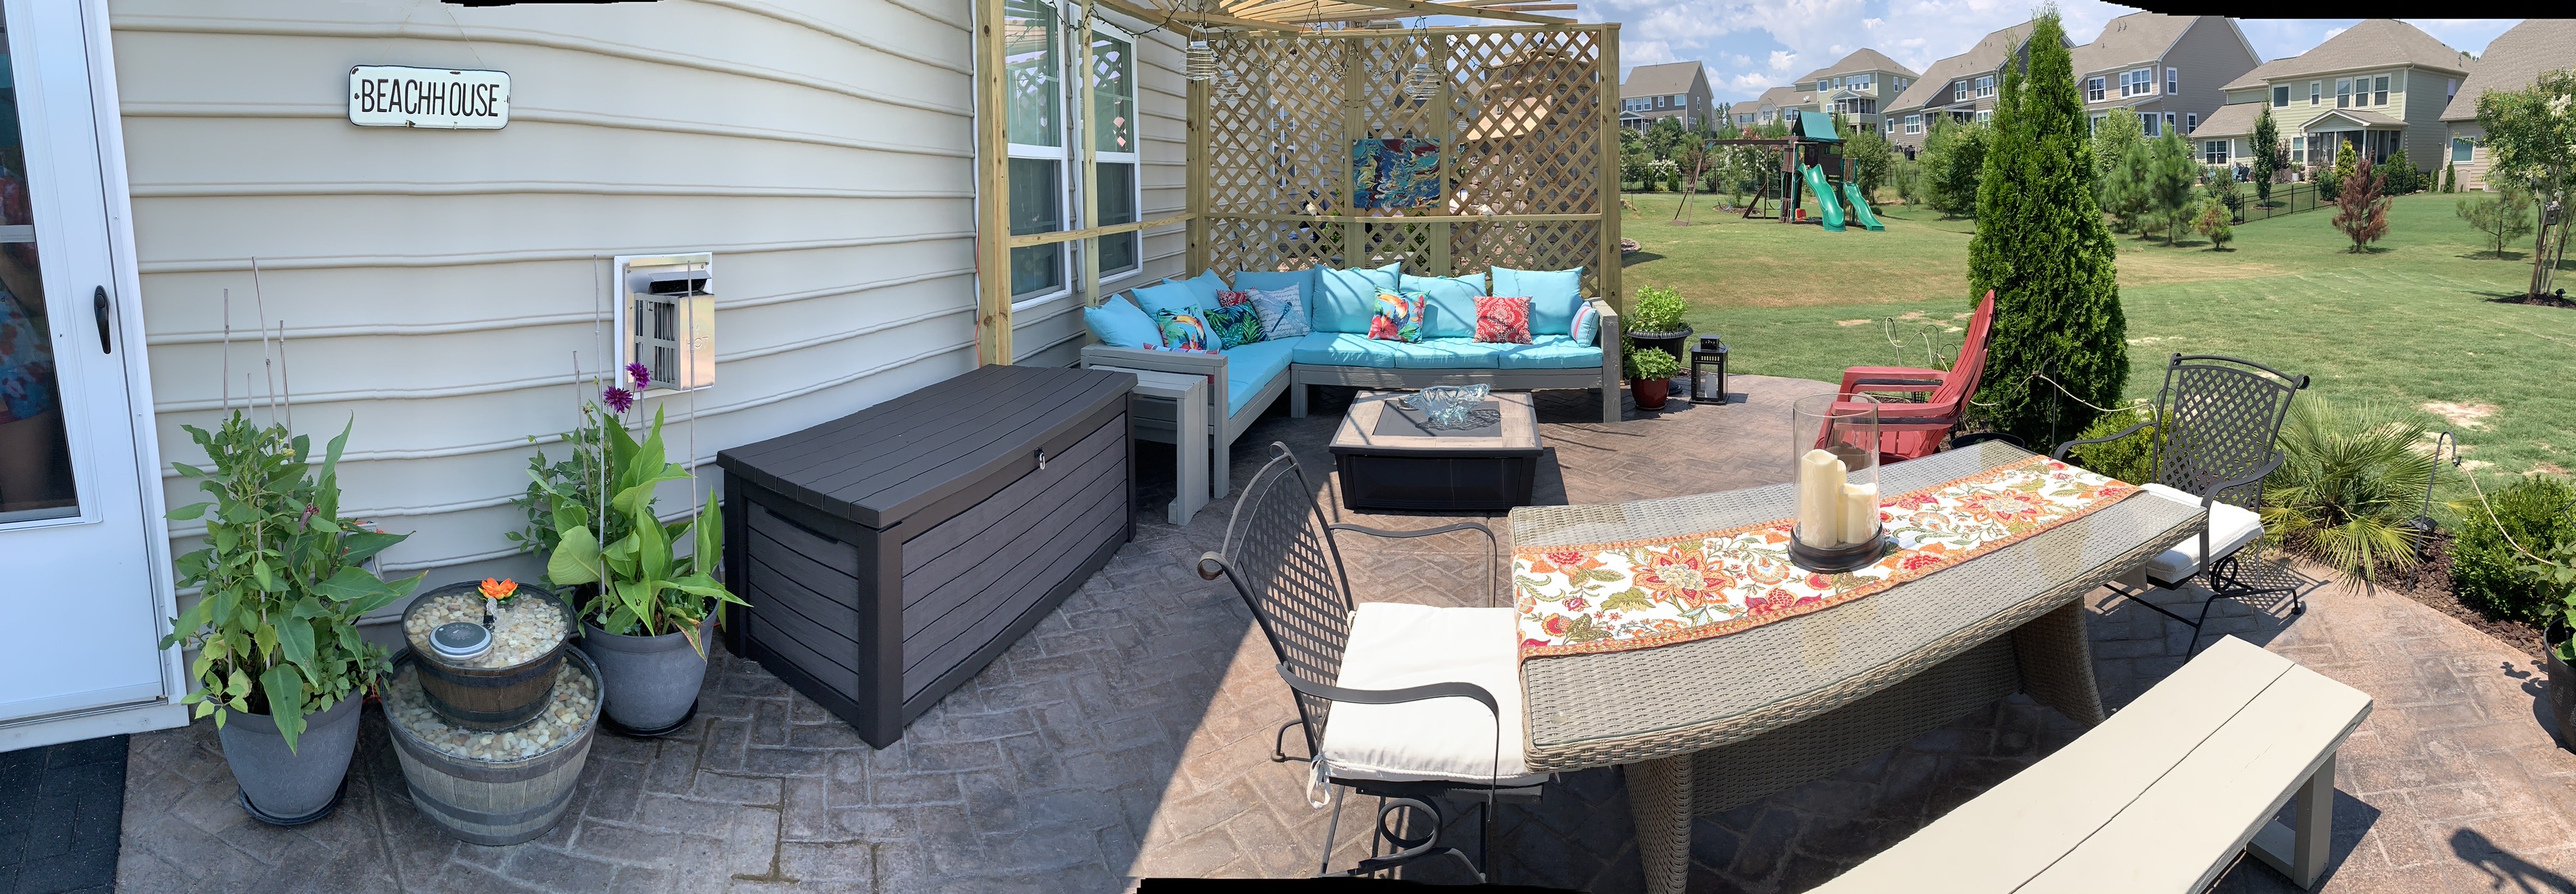
I’ve completed another project this summer that I wanted to share with you: a diy freestanding triangle pergola:
I searched high and low on the internet for plans for a freestanding triangle pergola design. I didn’t want the hassle of having to put my posts into poured concrete and such. I wanted something simple, or at least as simple as I could make it.
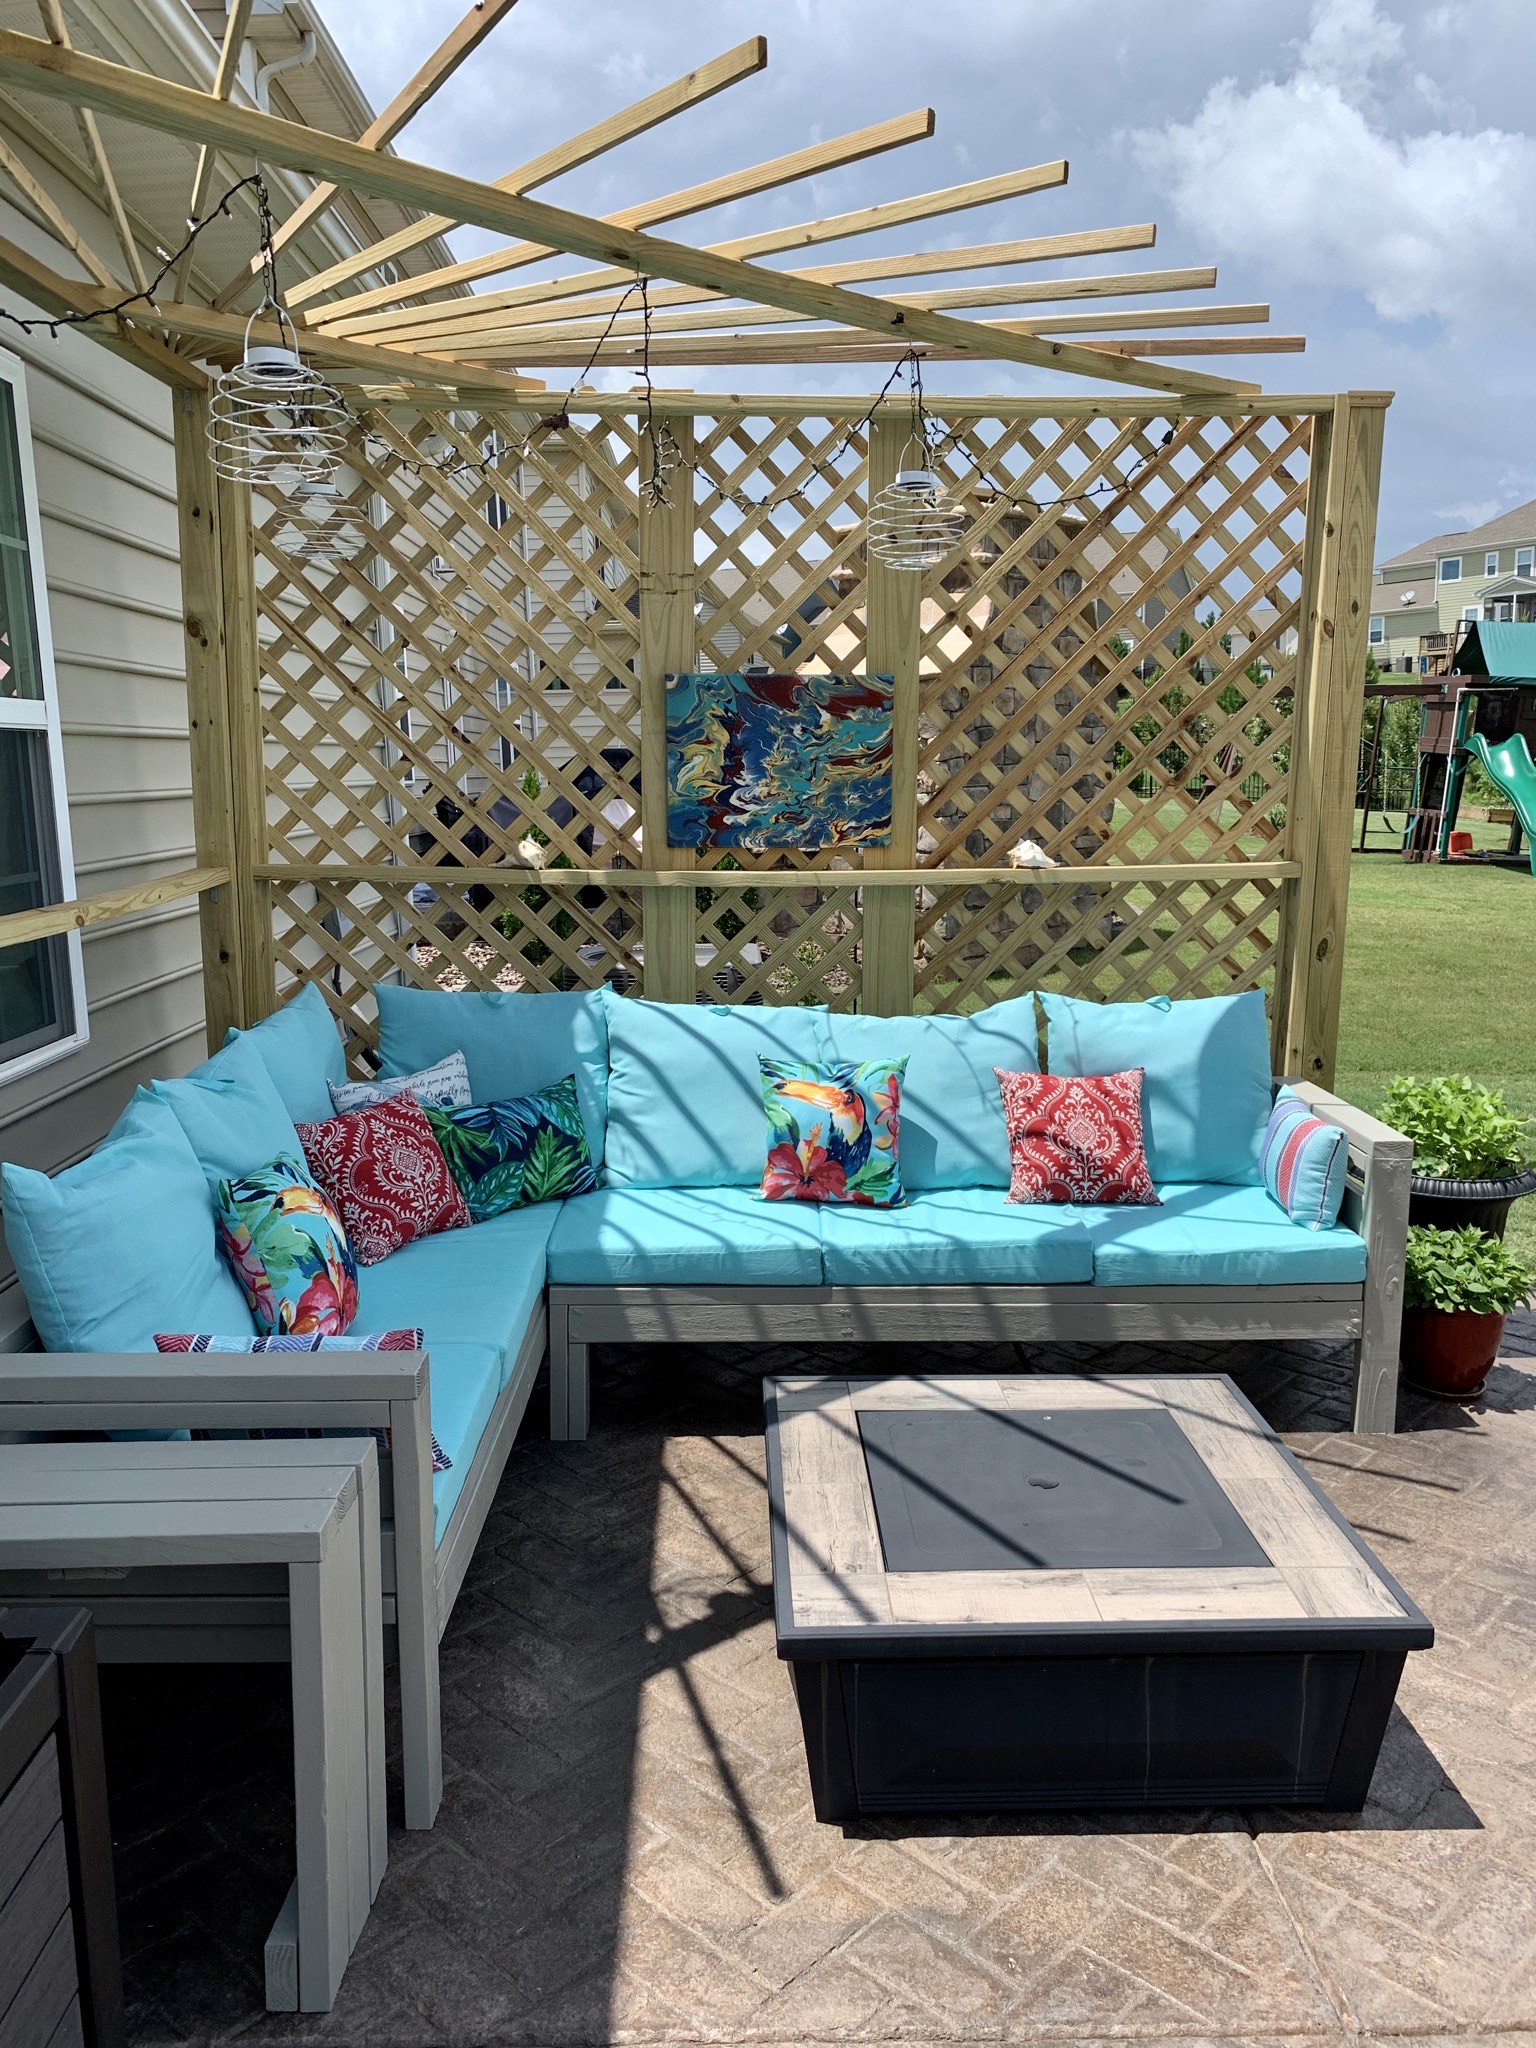
As many of you saw, I recently built my own outdoor sectional, and I wanted a pergola to follow the lines of this sectional and fit the size precisely. I mainly wanted the pergola to create privacy between our patio area and the neighbors’ patio area next door.
Well, I didn’t find any plans that I could use or even work off of, so I began to come up with my own design. I got out my graph paper and started drawing and logically tried to figure out where the weight needed to be so that it would stay together and the wind wouldn’t blow it away. Hopefully my basic physics knowledge wouldn’t fail me, lol… 😉 We get some really strong winds in our back yard because of the way our house is positioned, so I had to be careful about the strength and weight of the freestanding pergola.
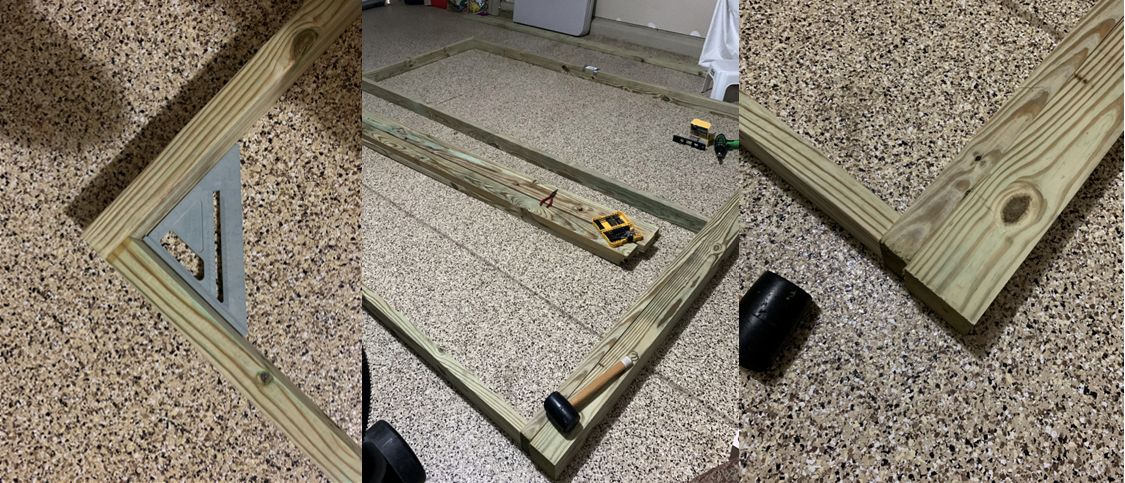
I bought three 4x4x8 posts and 14 2×4 boards to start with (the lengths for the left and right side boards were custom cut depending on the lengths of the sectional sides). Necessary items: needle nose pliers (for taking out staples from wood), a carpenter’s square (for ensuring right angles), a rubber mallet (for positioning boards), a stool to sit on, and of course outdoor wood screws and a drill/screw driver.
I started building in my garage where it was cooler and protected from rain. I used the other posts/boards for keeping things lined up and plumb. I made the two rectangle sides first:
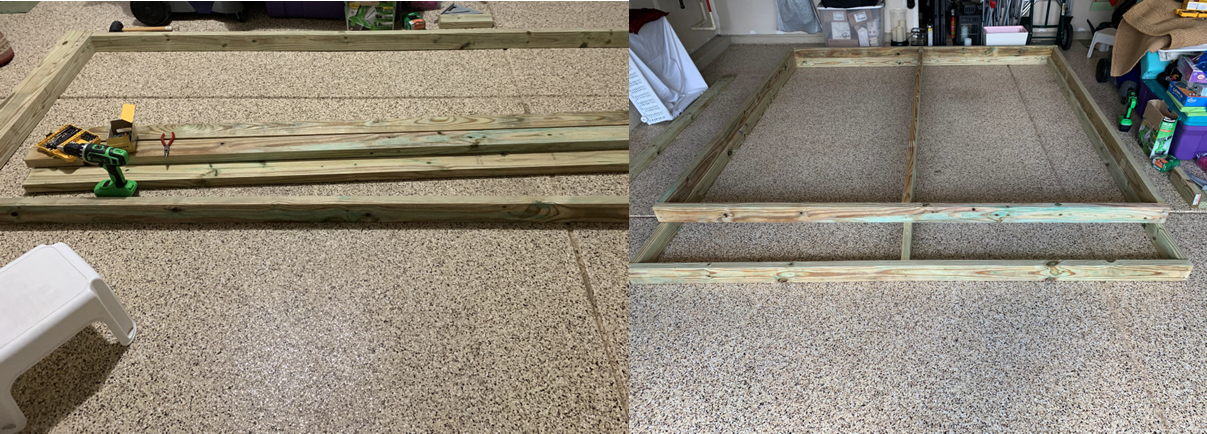
I screwed in a 2×4 in the middle of each of the sides. Once the two rectangle sides were built, I took them outside to the patio to build the rest (since the 4x4x8 posts were soooo very heavy!).
I then screwed in the 2×4 boards into the corner 4x4x8 post, then screwed the outside 2×4 boards on the sides into the two 4x4x8 posts for the sides. Note: I had to have two helpers to hold the 4x4x8 posts up while I screwed in the sides.
Once the two sides were on, I screwed the two 2×4 posts to the top. One was a 2x4x6, and the other was a 2x4x12. I had to cut the smaller one to fit (with a miter saw), but the long one I just left that size and placed it toward the front.
To make it appear more finished, I added caps to the 4×4 post edges of the two sides at the top and bottom. They come in four pieces per cap, but I separated them into l-shaped two-sided pieces. Thus, I used only two caps:

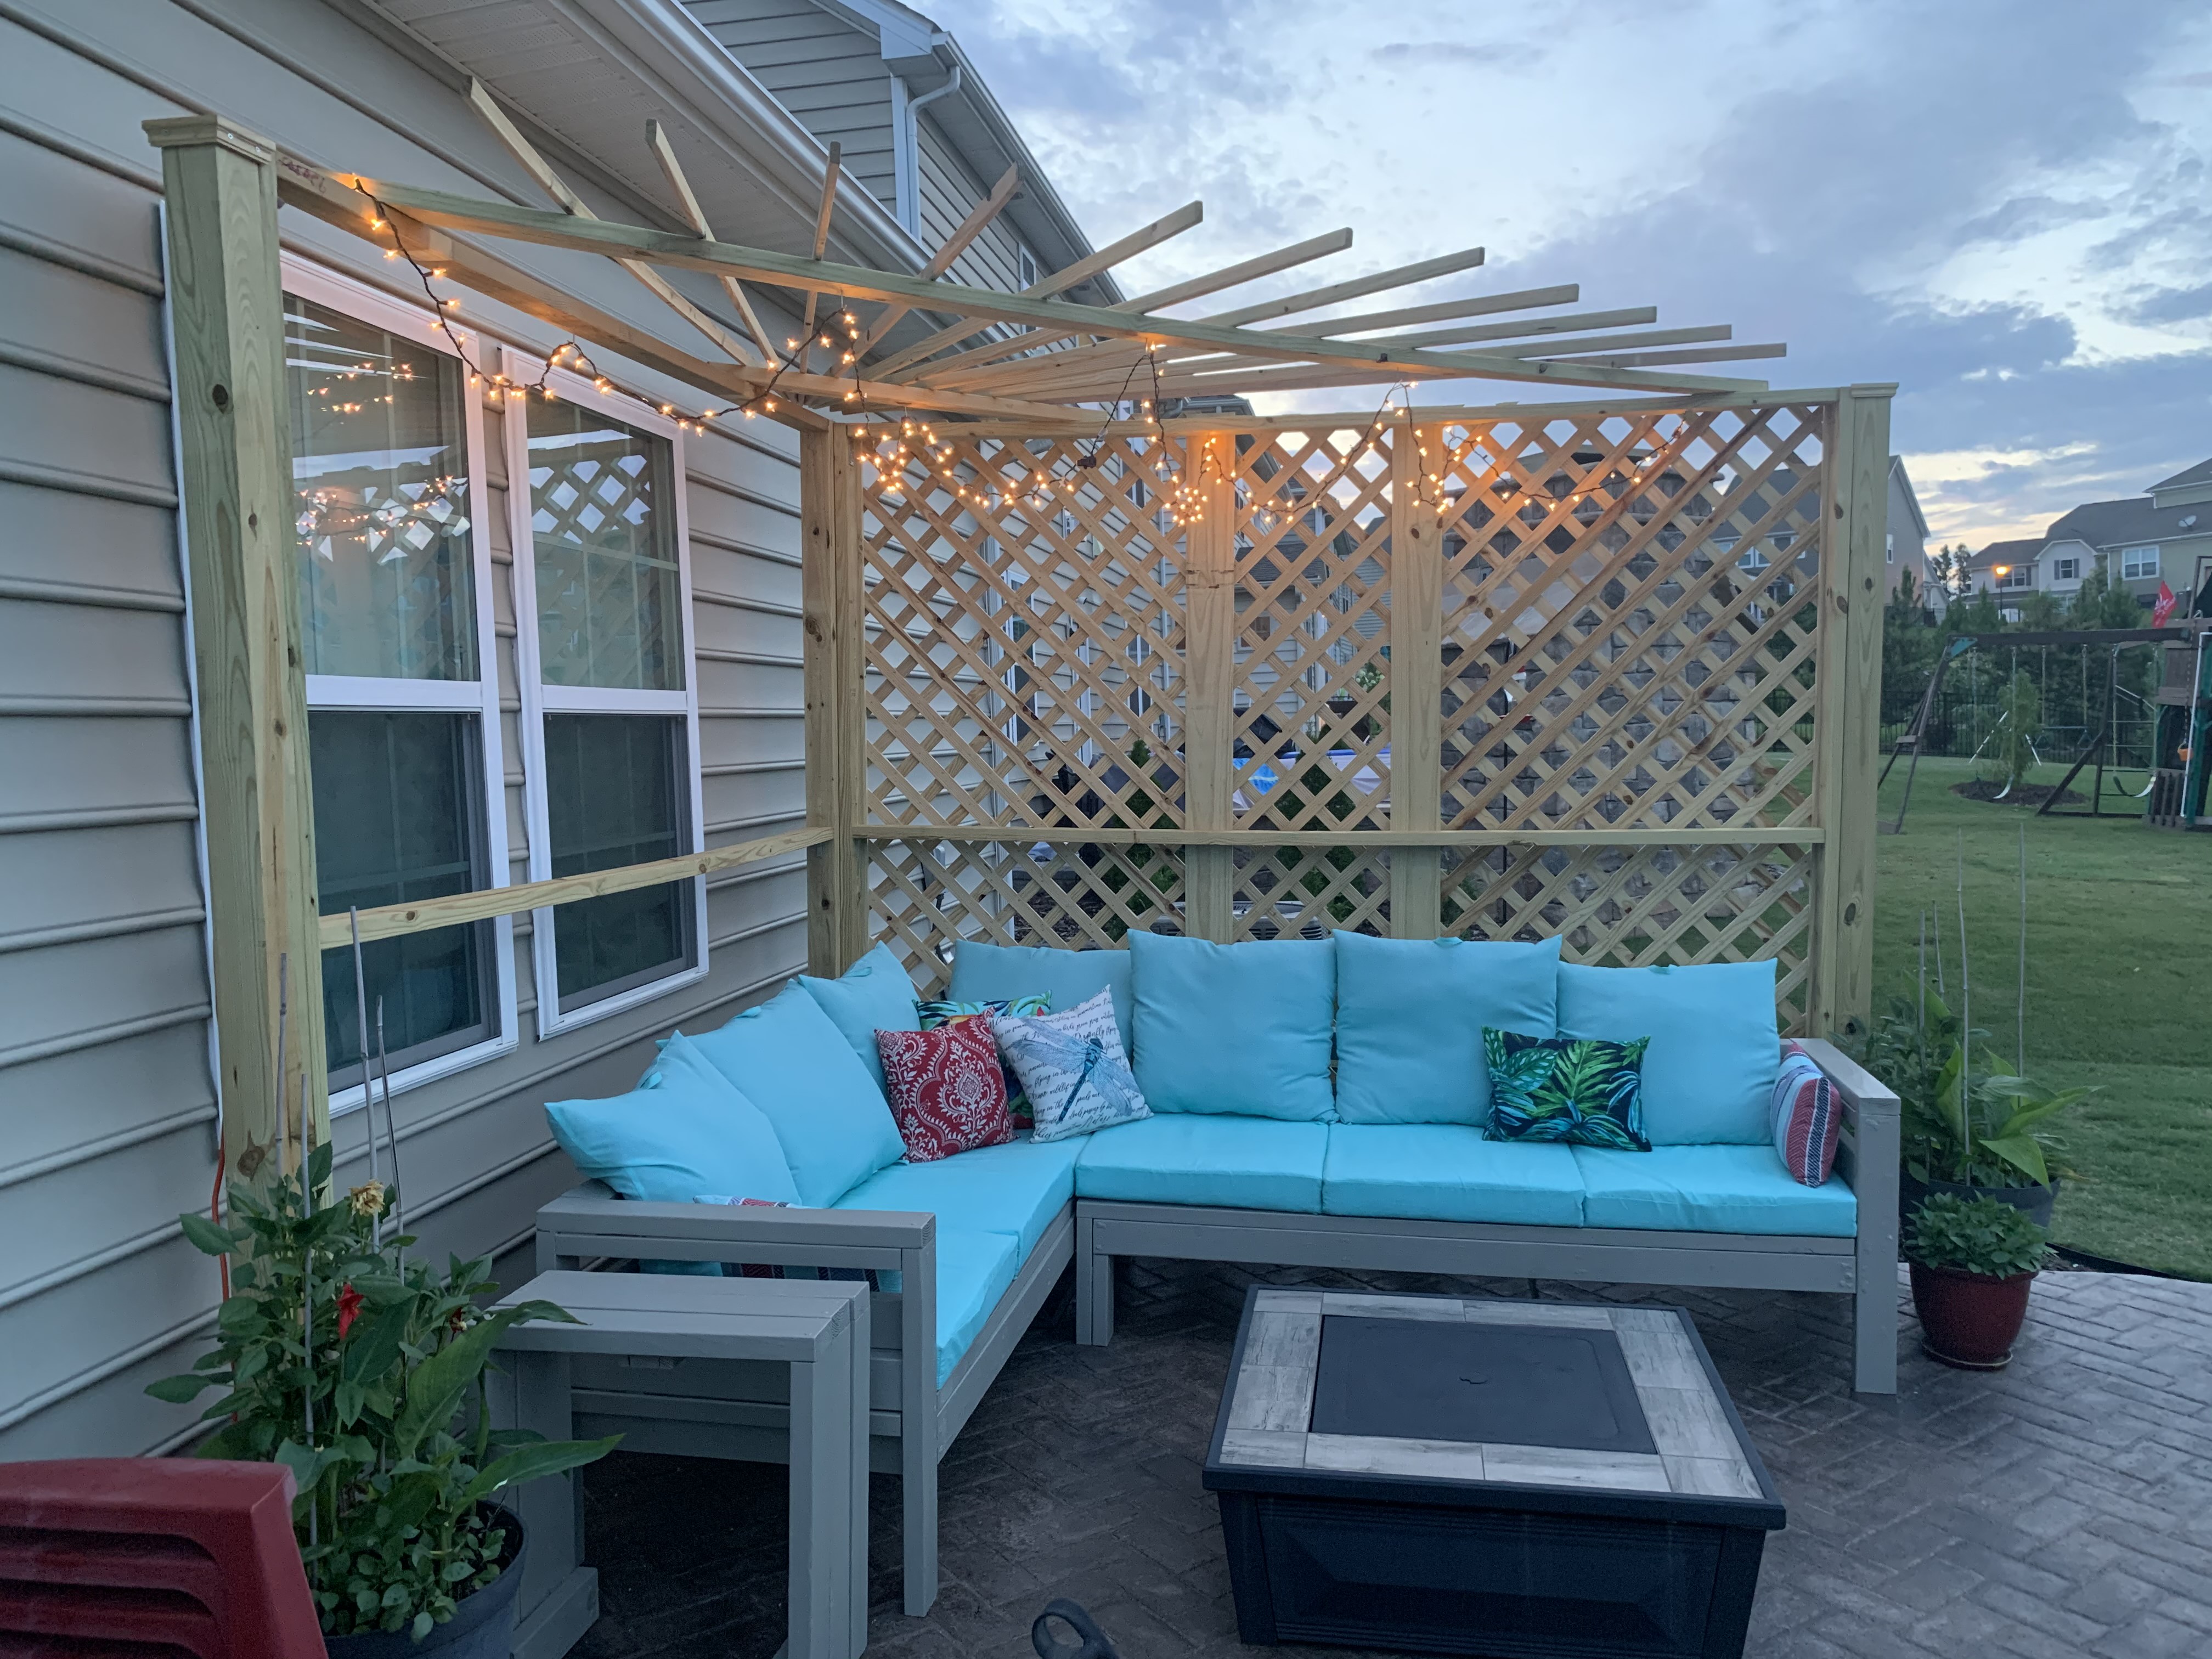
I then used a 6-foot ladder and carefully screwed in the 1x2x6 posts in a starburst design. I did not cut any; I simply fanned them out and kept them the 6-foot length. On the right side, I screwed in two 1x4x8 boards at the location where my three lattice strips would meet.
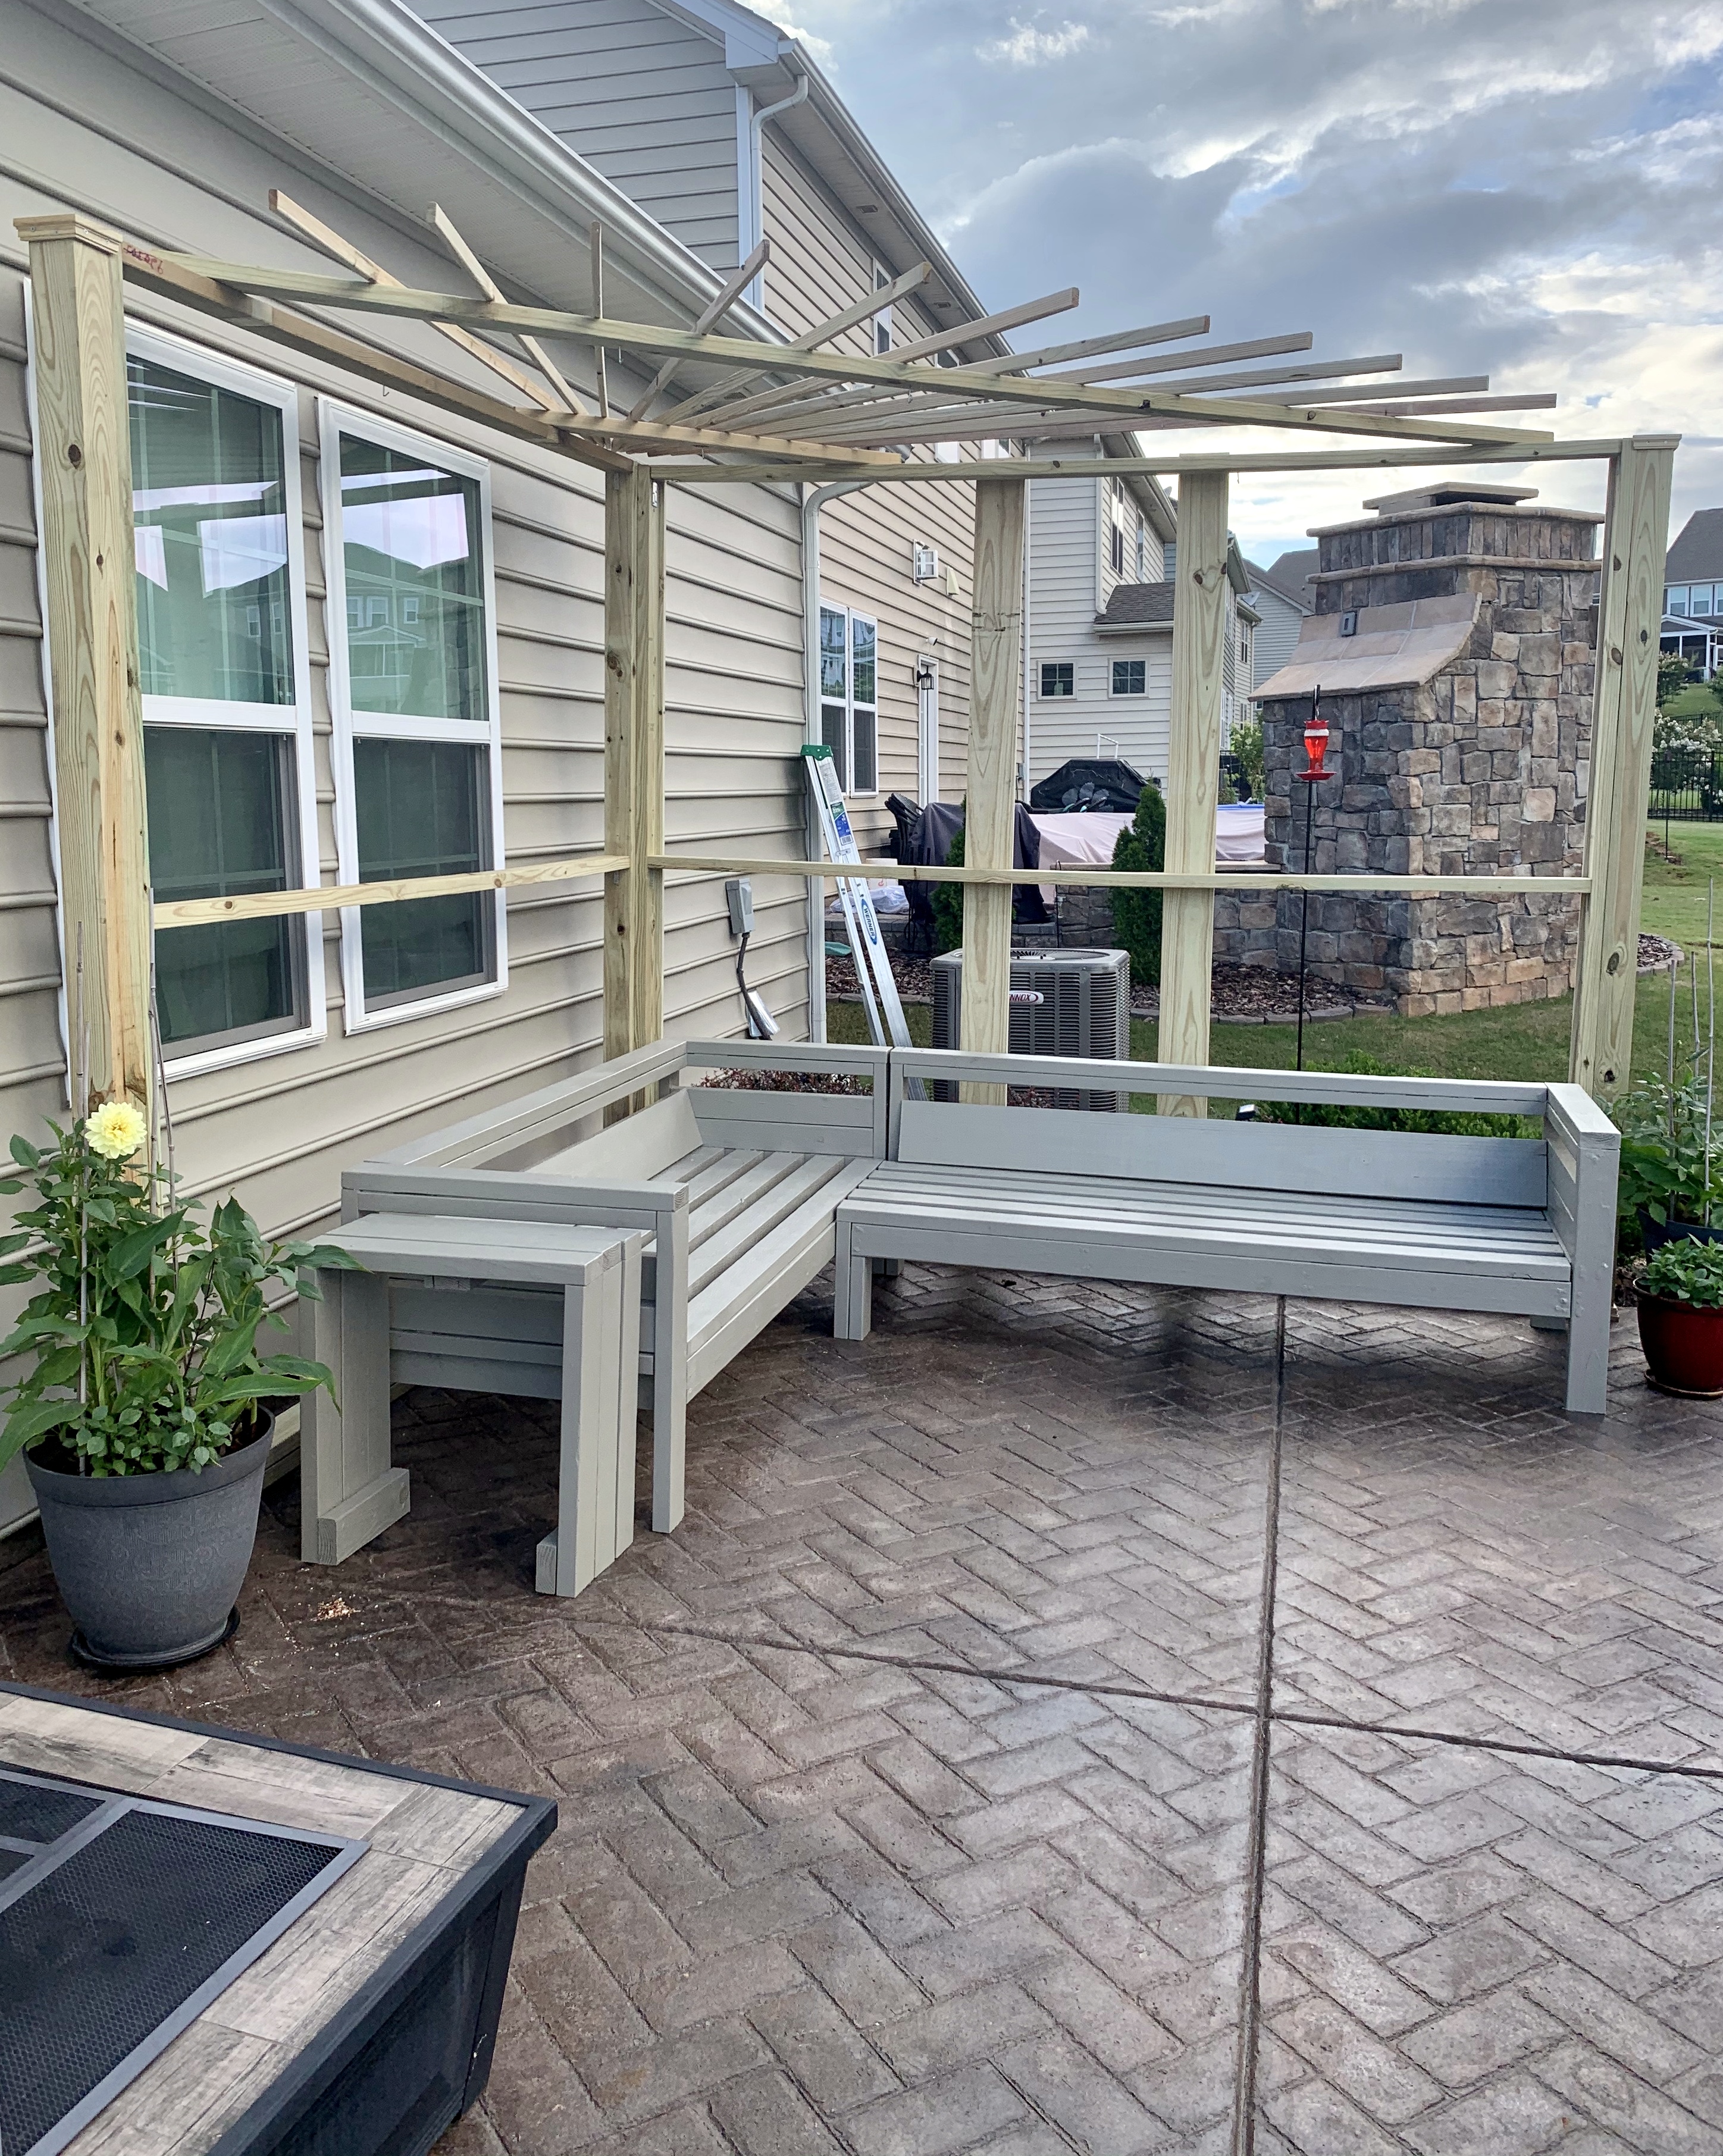
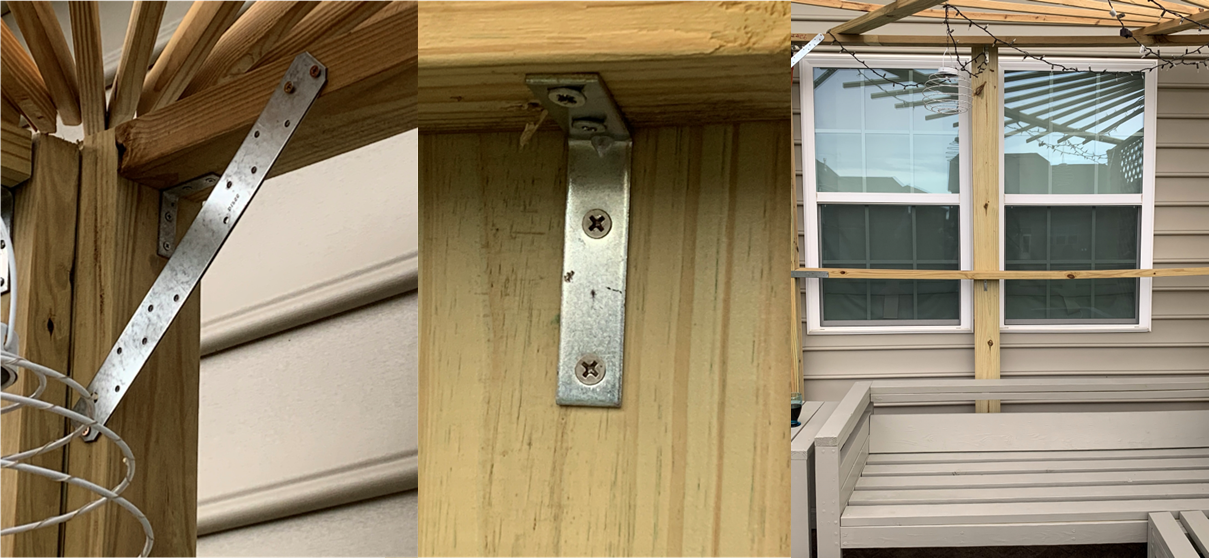
I then added metal l-shaped and straight supports to the corners to make sure everything stays at a right angle, and added a 1x4x8 board in the middle left side for added stability (while making sure to not block our windows):
I screwed in 3 strips of wood lattice: two 4×8 ft. strips and one 2×8 ft. strip. Make sure the length of each of your screws is not too long for what you are screwing into; it’s helpful to have a couple of different lengths.
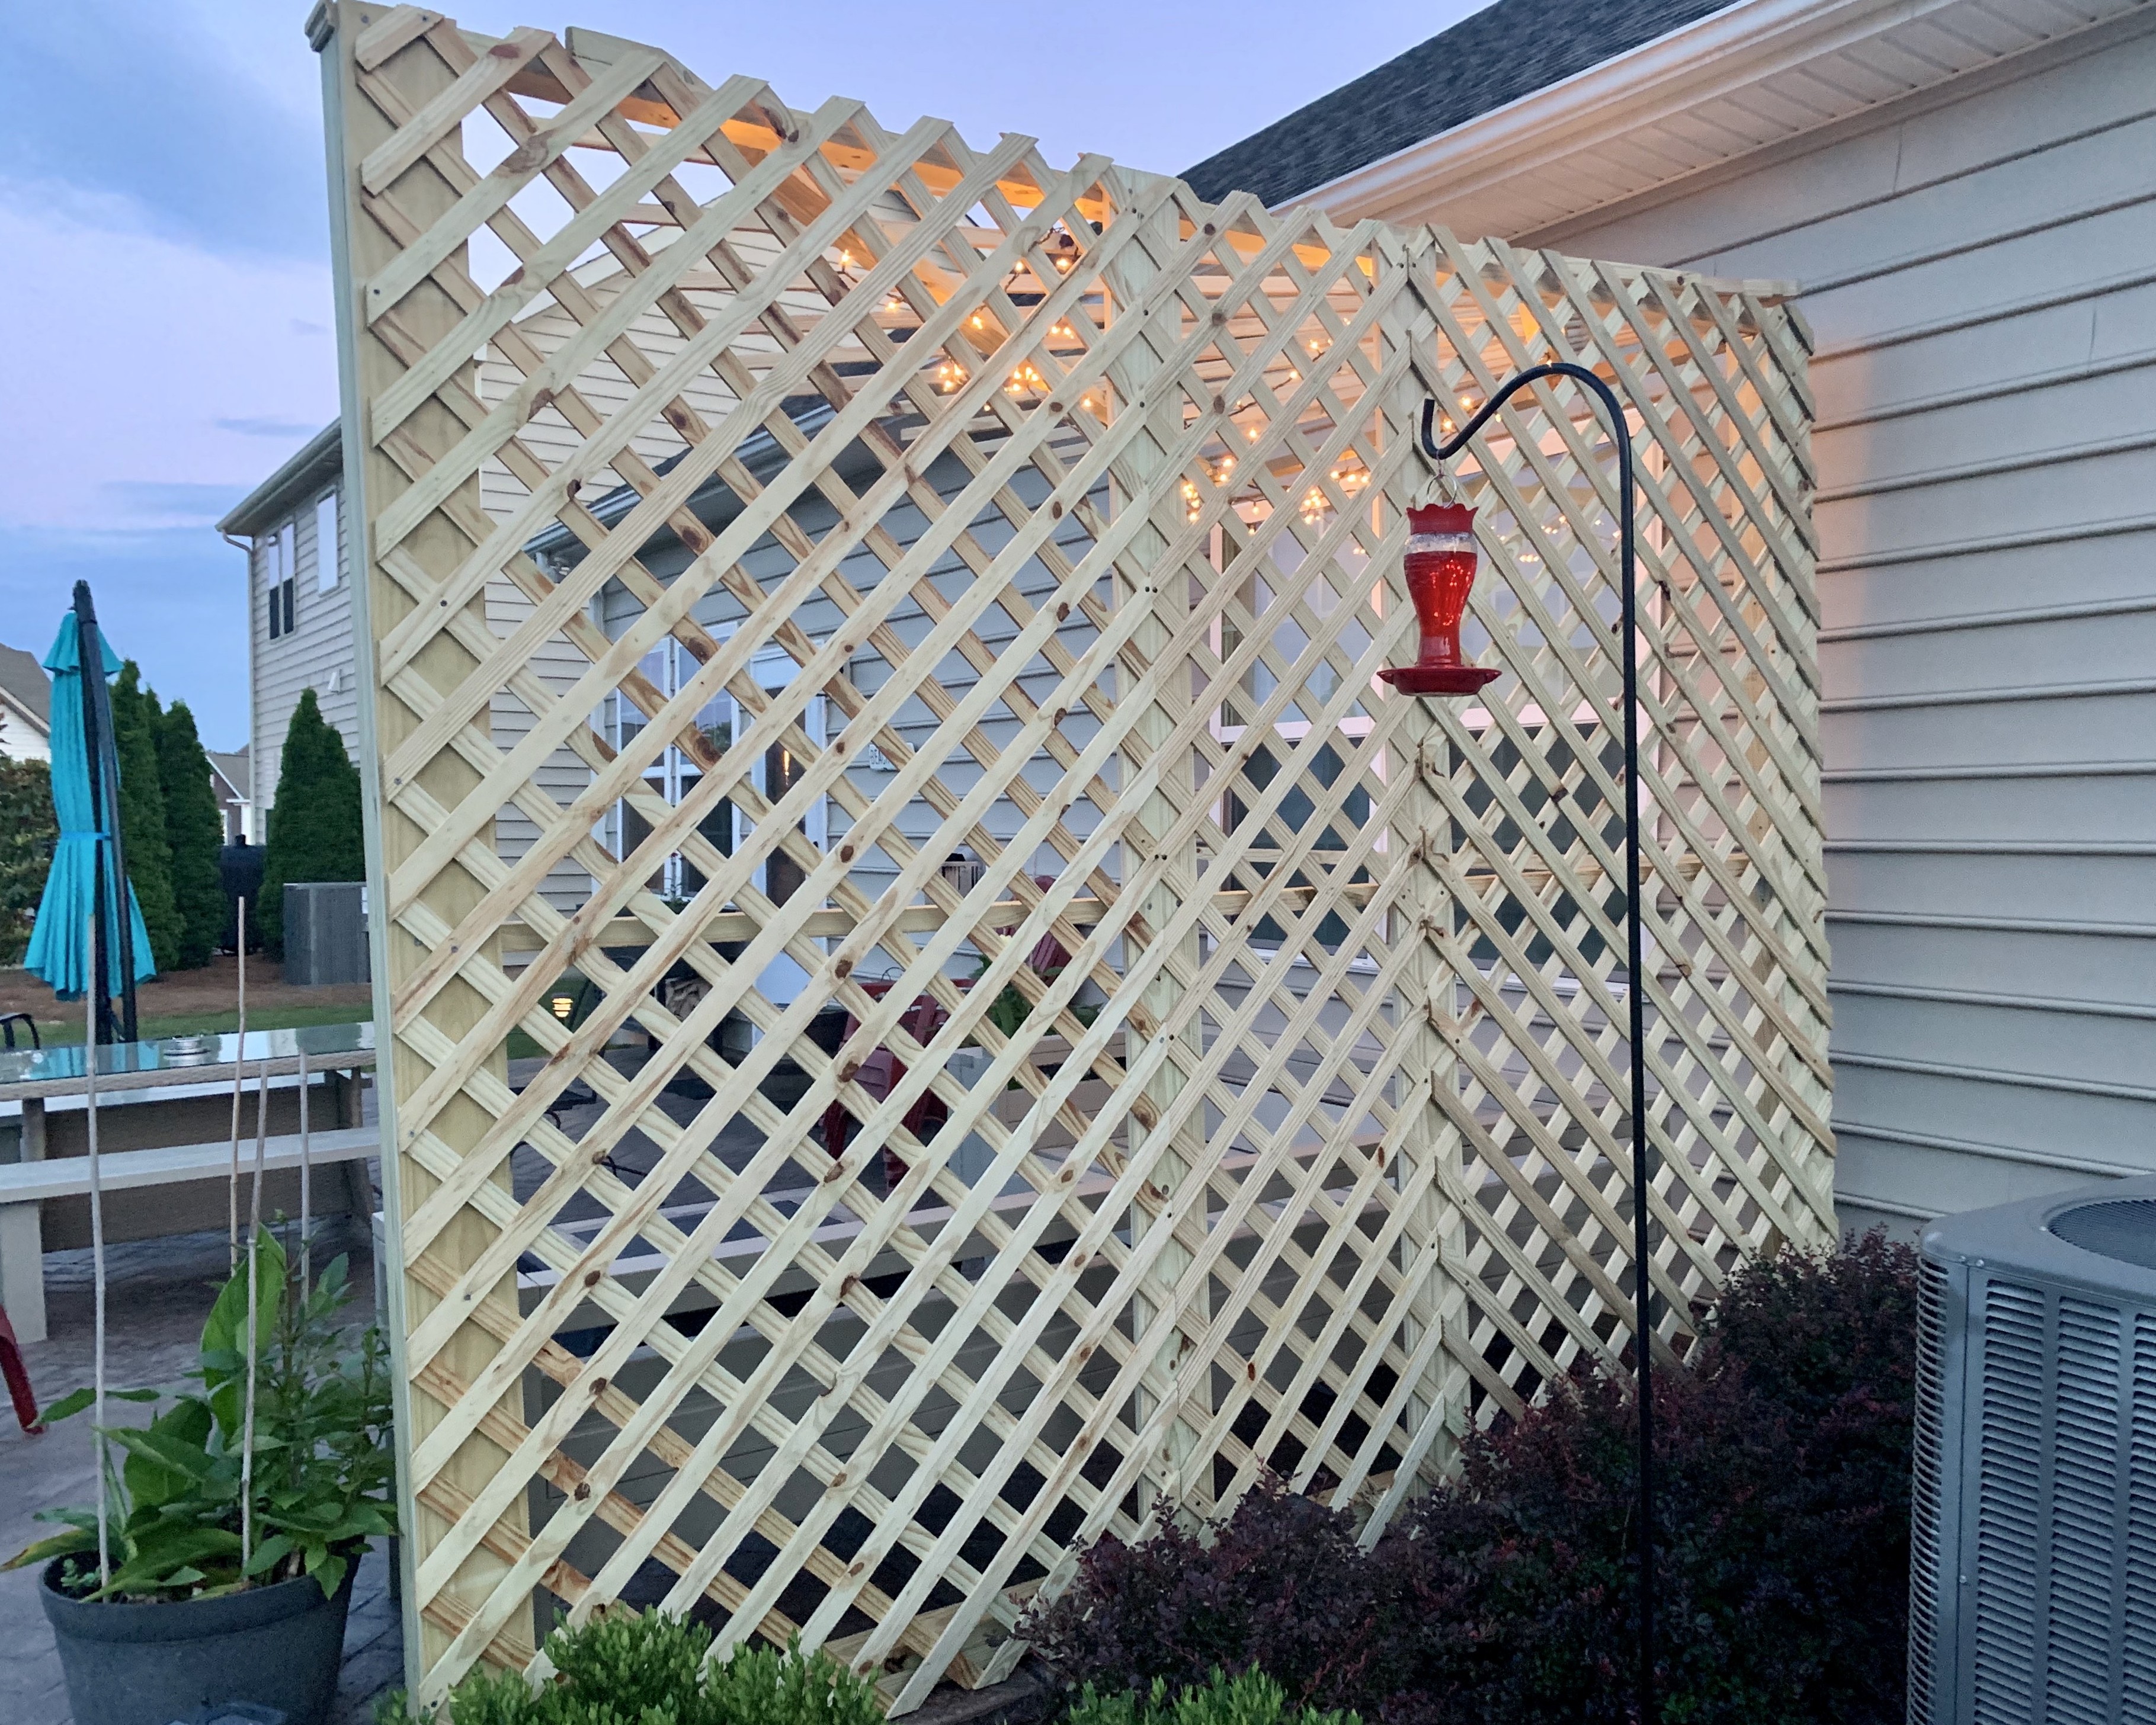
Voila! A custom-sized freestanding triangle pergola :). I then added string lights and solar led lanterns:
Here’s the pano again:
It is very sturdy and has been through a number of severe thunderstorms with very strong winds, and has held up quite well. I’m actually quite surprised and relieved!!!
I hope this inspired you to create something custom for your outdoor space!
If you’d like help creating a welcoming space for your home, please check out my local design and edesign services here.
Happy decorating!
Alison
Leave a Reply
Want to join the discussion?Feel free to contribute!